Request for Access to Links

There was a recent update that has caused my Google Doc links to stop working. Please send me a request for access to the files until I can get them up and running again. I will grant you access through the email as soon as I am able to, thank you!

9.28.2011

Interchangeable Photo/Quote/Recipe Block

I thought you might possibly be interested in making these blocks for yourself or for gifts maybe?  I didn't officially add it all up, but I think they only cost around $1 each...which is really not too bad!


So what are they for?  You can use the blocks to show off family photos (including snapshots that get tucked away and are forgotten about), quotes, recipes, kids spelling lists, dinner menu, grocery list, scripture of the day, thought of the day, joke of the day, alphabet cards, picture of Grandpa and Grandma, kids drawings or handouts they bring home from church etc., pretty much anything you can clip on!

The photo blocks can easily be personalized.  There are endless possibilities that can be created by using different styles of scrapbook paper and embellishments.  Plus, it's just plain fun to come up with new looks!

  Alphabet Printable at Sprik Space and loads of cute free printables!


Go to Sprik Space for LOTS of cute and free printables.


Supplies

2 x 8 board cut into a square (7 1/4" x 7 1/4" x 2)
Electric Sander and Sandpaper
Hot Glue Gun
1 1/4" Binder Clip
Paint and Foam Brush
Distress Ink (Dark Walnut)
Mod Podge
Scrapbook Paper 1-two sided sheet or 2 coordinating papers
Ribbon, jute, etc.
Embellishment for the clip

 Want to make one?  Here's how you do it:

1. The blocks measure 7 1/4" x 7 1/4" x 2".  They are cut from a 2x8.  I know, confusing right?  When you look for a board, set it on the floor, pick up one end of it and then put your eyes right up to the board to look down it to see if it's straight.  You will probably need to dig through the boards to find the best ones.  I used pine because it's cheap.

2. Sand the block with an electric sander to take off the rough edges. Wipe down with a damp paper towel.

3. Paint the block and let dry.  I bought a sample of black paint at Lowe's for $3 and I love how it went on.  I thought it was so much better than craft paint.  The Lowe's employee mixed it with extra black because I wasn't going to prime the board--worked like a charm!

4. When the paint is dry sand the edges and corners to take off some of the black paint.  Wipe down with a damp paper towel

5. Cut out the scrapbook paper just smaller than the block.  The top piece should measure @ 6 5/8" x 5"  and the bottom piece should be cut at @ 6 5/8" x 2".

6. Run a distressing ink pad around the edges of the paper.  I found it worked well to smear the ink into the paper with my finger before it dried.

7. With a foam brush, brush the Mod Podge onto the front of the block.  Press the scrapbook paper on and press the paper down with your fingers to remove any air bubbles.  Let dry.

8. Brush a layer of Mod Podge onto the top of your paper.  After it's applied, run a dry brush across it in the opposite direction of the brush lines to create a mat effect.  You can also scrunch up a plastic sack and gently dab the glue with it to give it a canvas look.  Let Dry.

My sister had the ingenious idea to use a ribbon to glue the clip on.  I was trying to think of a way to attach the clip so there wouldn't be concerns that it might pop off after a few uses (I hate it when things like that happen, I never seem to get around to fixing them) and also so I didn't have to pay for a tube of expensive glue.  When I called her, she had the perfect solution, just run the ribbon through it!

9. Run your ribbon through a 1" binder clip, fold the ends under, pull the two ends together and hot glue in the center back top of the block.  The top of the clip should be even with the top of the wood.  This allows you to pull the clip away from the board to switch out the photos.


10. Hot glue an embellishment onto the front of the clip if you'd like.  The firetruck is a button from a scrapbooking store, it came in a package of 6 different vehicles for $2.49.

11. Use some ribbon, jute, fabric, whatever you like to hide paper seam and wrap it around the block, overlapping it by 1" in the back.  Hot glue in place.  The white ribbon, pictured above, was Mod Podged on, it worked really well.

12. Clip on your favorite family photo, recipe, quote, whatever you like.


The ladies at my church will be making these photo blocks at our Craft Night next week, so I'll be busy for the next few days getting everything all ready to go.  It should be fun!

I searched around for some inspiration, looking for things that I liked about other photo blocks, before making these.  Check out the posts below for some great ideas!

Today's Fabulous Finds...

at Under the Table and Dreaming

at Little Birdie Secrets

at Lil' Luna

at Shanty 2 Chic

Wood Photo Blocks

Free print at Poppies at Play


Linking up here:

Tip Junkie handmade projectslil luna link party button


Pin It!

9.23.2011

Interchangeable Fall Frame

Happy Fall!

It's hard to imagine that today is the first day of Fall.  This summer seemed to whiz right by, am I right?  I have mixed feelings about Fall.  On one hand it means beautiful Fall foliage and cooler temps, but on the other hand, it brings with it shorter days, allergies, and is a sign that Winter is right around the corner.  I'm so not looking forward to Winter again, didn't we just have one?   At any rate, I'm going to enjoy this season and try not to think about what's coming up next...brrr.

The first day of Fall seems like the perfect time to show you how simple it was to update my Interchangeable Holiday Frame.  


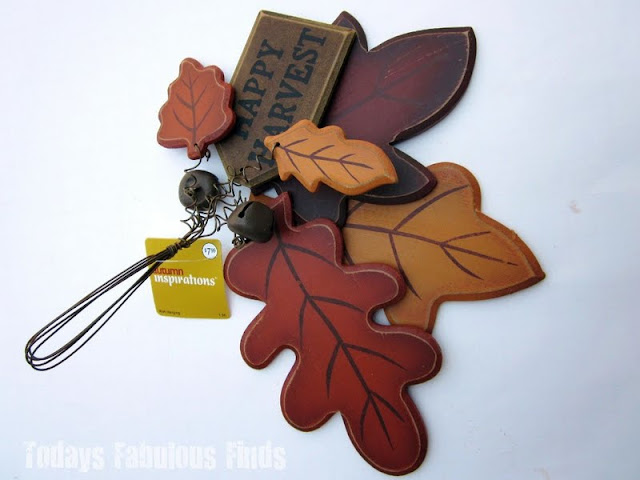
Do you remember this cluster of wood leaves that I bought at JoAnn's on sale for just under $5?  I used the smallest leaves for the Square Block Pumpkin


I cut the wire in half (the leaves are connected in pairs), curled it around a pencil, and then hooked it over the nail.  Pretty simple.  I did need to use a small piece of masking tape on the back side of the sign to keep it in place. 


If you're interested in how to make your own Interchangeable Holiday Frame, you can read all about it here.   The frame came from the dollar store, so if you have any troubles finding one the right size, you could also make a simple frame with some trim from Lowe's or Home Depot and back it with heavy cardboard.

I hope you all enjoy this first day of Fall! 

Today's Fabulous Find...Decorative Wood Leaves for Fall Frame

Linking up here...

Visit thecsiproject.com


Pin It!

9.21.2011

{Free} Halloween Costume E-Book

Are you thinking about Halloween Costumes yet?   All Free Holiday Crafts has put together a fun e-book filled with tutorials for 14 different Halloween costumes to make at home and it's FREE!


Quoted from All Free Holiday Crafts:  "In this free, downloadable eBook of 14 Costume Ideas to Make at Home, you'll find everything from adorable character costumes to cute animal-themed outfits and so many more creative and cute Halloween costumes, we can't even begin to name them all!"

The little cardboard box train costume (with a real working light) that I made for my son(s) is one of the costumes featured in the e-book, go check it out, it's a fun one. :)

Todays Fabulous Find:   
Creative and Cute Halloween Costumes [FREE] eBook

Pin It!

9.20.2011

Featuring: Book Page Pumpkin

Kara at Creations by Kara has shared some fantastic craft ideas (and delicious recipes too), so it was no surprise when she posted this fabulous Book Page Pumpkin.  It's creative, fun, and best of all easy and inexpensive to make! 


You can read about how she made it here, or go ahead and watch the video of her TV appearance here.  She did a great job!  So hurry and go visit Kara to learn how to make one of these cute pumpkins for your fall decor, party decorations, or as a special gift for a friend or teacher. :)

Today's Fabulous Find...Book Page Pumpkin


Pin It!

9.17.2011

Fall Burlap Wreath

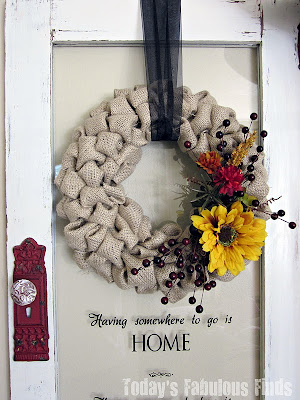
I've been busy today putting up some Fall decor and couldn't wait to show you how I spiffied up the burlap bubble wreath for Fall.  It's all dressed up now and I couldn't be happier with how it turned out!


Yesterday I went to JoAnn's to look for a zipper pull, well I didn't buy a zipper pull, but I did buy some fun things for Fall.  Isn't that how things usually go?  All of the Fall flowers were 50% off, so I took advantage of the sale and picked up some berries for $1.00 each, and a stem of flowers for $1.50.


I think it's just what the wreath needed to brighten it up.  I just bent the stems, poked them right into the foam wreath in-between the burlap bubbles, and then used a straight pin to attach the flower to the burlap.


Every time I walk by my little decorative door now, that yellow sunflower catches my eye and it actually makes me feel happy.  Crazy, but true. :)

Today's Fabulous Find...Fall Burlap Wreath


Pin It!

9.16.2011

Celebrating One Year of Blogging!

It's hard to believe, but Today's Fabulous Finds is one year old today!  


One year ago today I made the decision to click on the little box to make this blog public for all to see. Boy, was I ever nervous! My heart was racing as I wondered if I was ready, if I knew enough about computers to figure out what I needed to know, and most of all, if anyone would even be interested in what I had to share.  (That was a big one.)

I was in unfamiliar territory and had little knowledge about writing a blog, very little.   It's probably good that I was so naive at first or I don't know if I would have had the courage to do it.  Over the last year I've learned so much. Google searches provided me with an answer to almost every question that I had. I learned how to make my own header, what a gadget was, and I even learned what an HTML code is.  Like I said, I really didn't know much!   Every single day I continue to learn something new.  This is one of the biggest reasons why I love blogging.  Another huge reason would be how great it feels to have a way to share with others and also to promote others creative ideas.

Over the past year, Today's Fabulous Finds has had a few different looks, wanna see?  There were a couple others at the first, but I'm too embarrassed to show them to you. :)

Past and Present Header Designs


It's crazy to think that over the last year, this blog has had over 500,000 page views.  Are you curious what people were looking at?  Ya, probably not so much, but I was. :)
 
All-time Top 10 Posts

The paint stick ornaments post has been in my top 10 (of the week) over on the sidebar since the day I posted them.  They never dropped out once, not even during the summer months.  This post alone has been viewed over 25,000 times, so I expect there may be a few of them hanging from Christmas trees this Christmas, which is so exciting to me! 


I took a chance with this one, declaring that I wanted to bring back the 90's bubble wreath, lol!  I don't know, but I think we did it. ;)  Thanks for your help! 


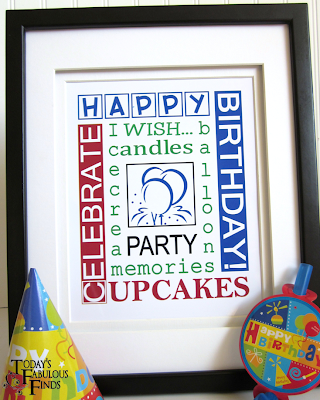
This print is one of my favorites.  It's the first time that I added a color accent.


As a stay at home mom, blogging has been a wonderful way to continue learning and a fun hobby to keep me busy. Wow, has it kept me busy! I had no idea.   I also didn't realize that I could actually make friends through blogging or that I'd have so many opportunities to get to know women with similar interests from all around the world. What an amazing opportunity this has been!

Thanks to those of you who have left me kind and encouraging comments or have featured one of my projects, they made my day! 

I apologize that I don't have any wonderful, huge giveaways for you today, that would have been nice I know.   What I do have for you though is my great appreciation for making this such a positive and fun experience. :)  I look forward to seeing what's coming ahead!

 
Thank you for reading Today's Fabulous Finds!   

Pin It!

9.13.2011

Square Block Pumpkin {Tutorial}

I mentioned in the Fall Subway Art post, that I thought it would be fun to display the prints in a new way and decided to just tape the print to a wood pumpkin.  I didn't take pictures of the steps this time, but I think it's pretty easy to see how it's done if you decide to make one.  


Supplies
Square block of wood
(This block is from a 2 x 6 which really measures @5 1/2" square.)
Paint and Foam Brush
Scrapbook Paper
Ribbon
Sand paper
Distress Ink or Dark Stain
Mod Podge and a Foam Brush to apply
Small piece from a branch
Reindeer Moss (or whatever you have on hand)
Leaves to embellish (wood, fabric, or artificial)
Craft Wire
4" x 5" Photo (optional)


When I was at JoAnn Fabrics the other day I saw this bunch of painted wood leaves.  They were priced at $7.99 and then were 40% off.  I already had a purpose for the larger leaves and thought the smaller ones would look great on a little wood pumpkin. 


Directions

  1. Sand the edges of the block (an electric sander gets the job done quickly)
  2. Wipe off any sawdust with a damp rag or paper towel.
  3. Paint.  (I bought one of Lowes sample paints in black to try and was impressed with how much nicer the paint looked when applied than acrylic craft paint.)
  4. Allow paint to fully dry. 
  5. Sand all of the edges and corners to distress.
  6. Wipe over the edges with an ink pad (dark walnut works well) or with some dark stain on a rag.
  7. Cut out a piece of scrapbook paper about 3/8-1/2 inch smaller than the wood block.  Run an ink pad over the edges to give it a distressed look.  (I used scrapbook paper from a book by My Minds Eye, that was discontinued, but I just saw some really cute Fall prints at the craft store.  I'm sure you'll find something that you'll like, most likely even cuter than the paper I used.)
  8. Apply Mod Podge to the front of the wood block and press your scrapbook paper down over it.  Allow to dry.
  9. Mod Podge over the scrapbook paper running your brush in the same direction.  Then with a dry brush, run it in the opposite direction to give it a mat look.
  10. For the stem, cut off a small section from a branch (large pruning shears will work or a small hand saw) and hot glue it to the top center of the block.
  11. Use wire to attach the leaves.  Curl the ends around a pencil.
  12. Hot glue moss around the stem.
  13. Cut a length of ribbon long enough to go around the block and hot glue or tape it together in the back.  (I bought this ribbon at JoAnn's in the Fall section.)
  14. Tape or use sticky tack to add a photo, quote, etc.


When I was done, my daughter said, "Mom, you know that pumpkins aren't black don't you?"  Yes, it's true, generally pumpkins aren't black, but I painted the block thinking I'd make something else with it and then was too lazy to repaint it orange when I decided to make a pumpkin with it instead.  I'm okay with a black pumpkin, I'm really not too picky, at least when it comes to pumpkins.  ;)

 For more ideas, here are links to the [orange] 2x4 pumpkins that I made last year.


Today's Fabulous Find...Wood Pumpkins


Linking up to these fun parties...


Pin It!

LinkWithin

Related Posts with Thumbnails